
On this page
Choose the book before choosing the receipt
- Open the ledger where the expense belongs.
- On iOS, tap the camera-shaped Add Image control beside the note field, then choose Library or Camera. On Android, use the image or camera control in the composer.
- Select the receipt, then choose Recognize and Save on iOS or Recognize and record on Android. Both open a draft for you to check.
Use a photo that includes the merchant, date, currency and final total. If a receipt includes a subtotal, tax and tip, decide which total reflects the amount actually paid. The clearer the photo, the easier that comparison will be.
Read the draft alongside the receipt
The museum receipt has two admission tickets at USD 22 each and a USD 44 total. CoolMeow opens Confirm Details with an editable amount, currency, title and transaction time.
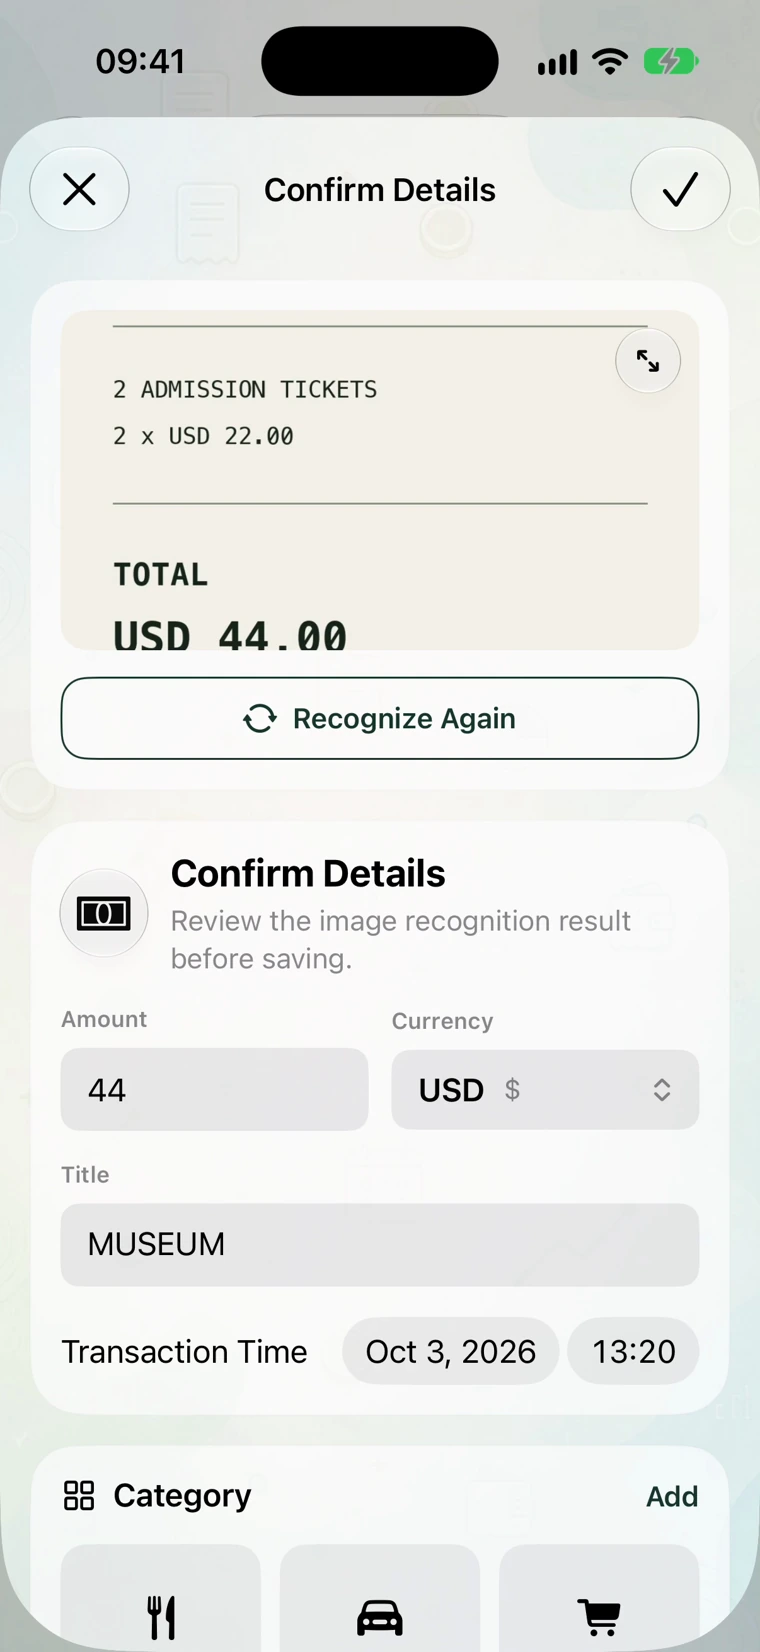
Compare amount and currency as a pair. A value of 44 is not enough if the draft picked the wrong currency. Check the merchant or title and date too. Tap a field to correct it; use the receipt preview if you need to read a line more closely.
If recognition returns several records, review each one. Two ticket lines and a receipt total do not automatically mean you should save three expenses. Save only the records that represent the purchase you want in your ledger.
Tell the app who paid and who took part
The receipt supplies the total. You choose the people: payer means who paid the bill; participants means who shares its cost.
Scroll to Payer & Participants. Choose Alex as payer, then select Alex and Sam as participants. On Alex's phone, Alex appears as Me. The form shows US$22 for each person.
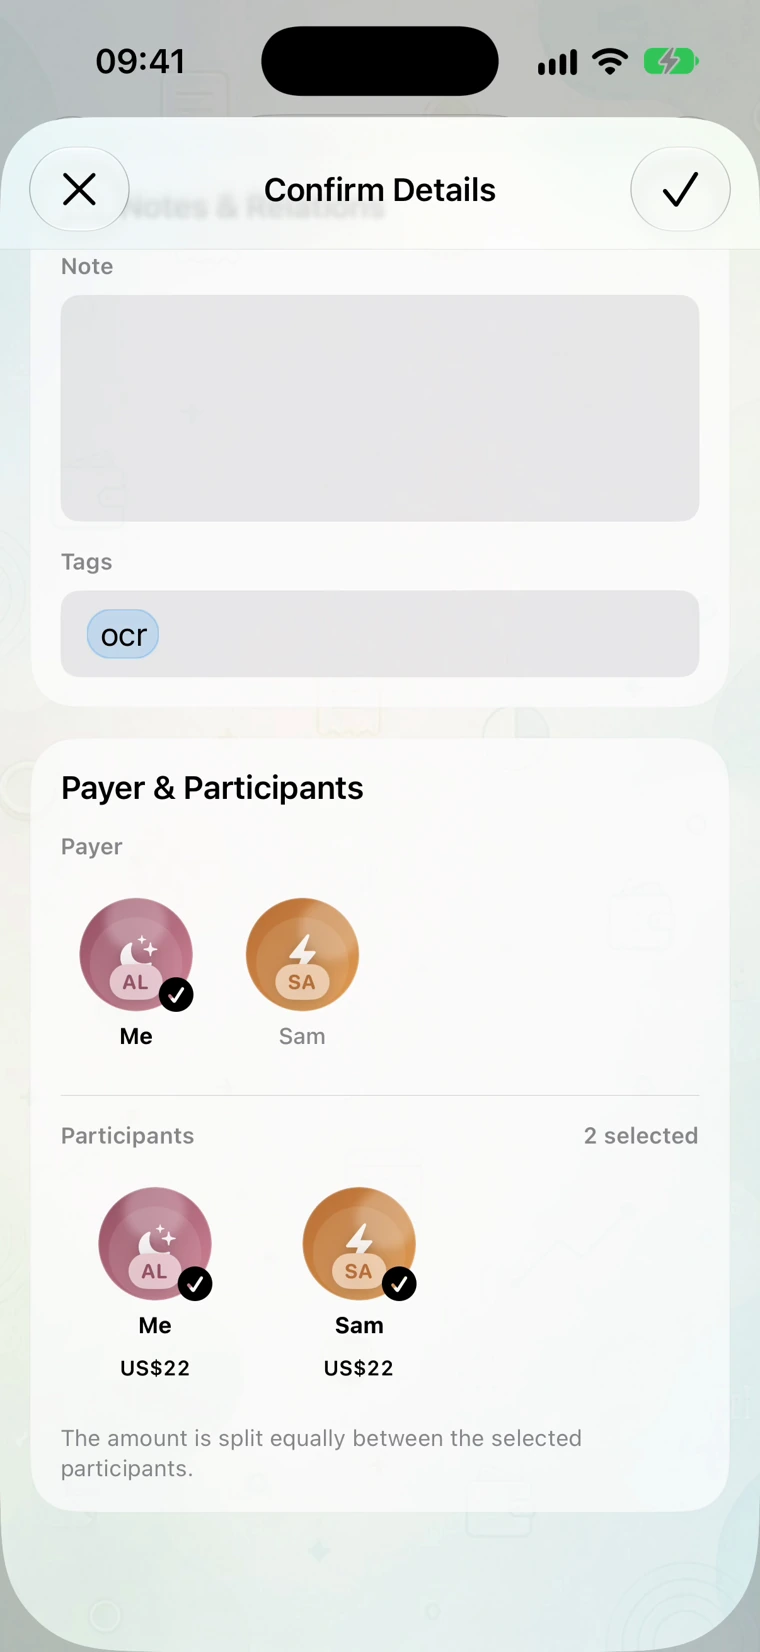
If only Sam visited the museum and Alex merely paid on Sam's behalf, choose Alex as payer and Sam as the sole participant. Sam would then bear the whole USD 44. The payer field and participant selection need to describe the purchase separately.
Save once, then wait for the shared record
Review the category and any note, then confirm the form. The saved museum entry appears on the iPhone and syncs to the Android ledger.
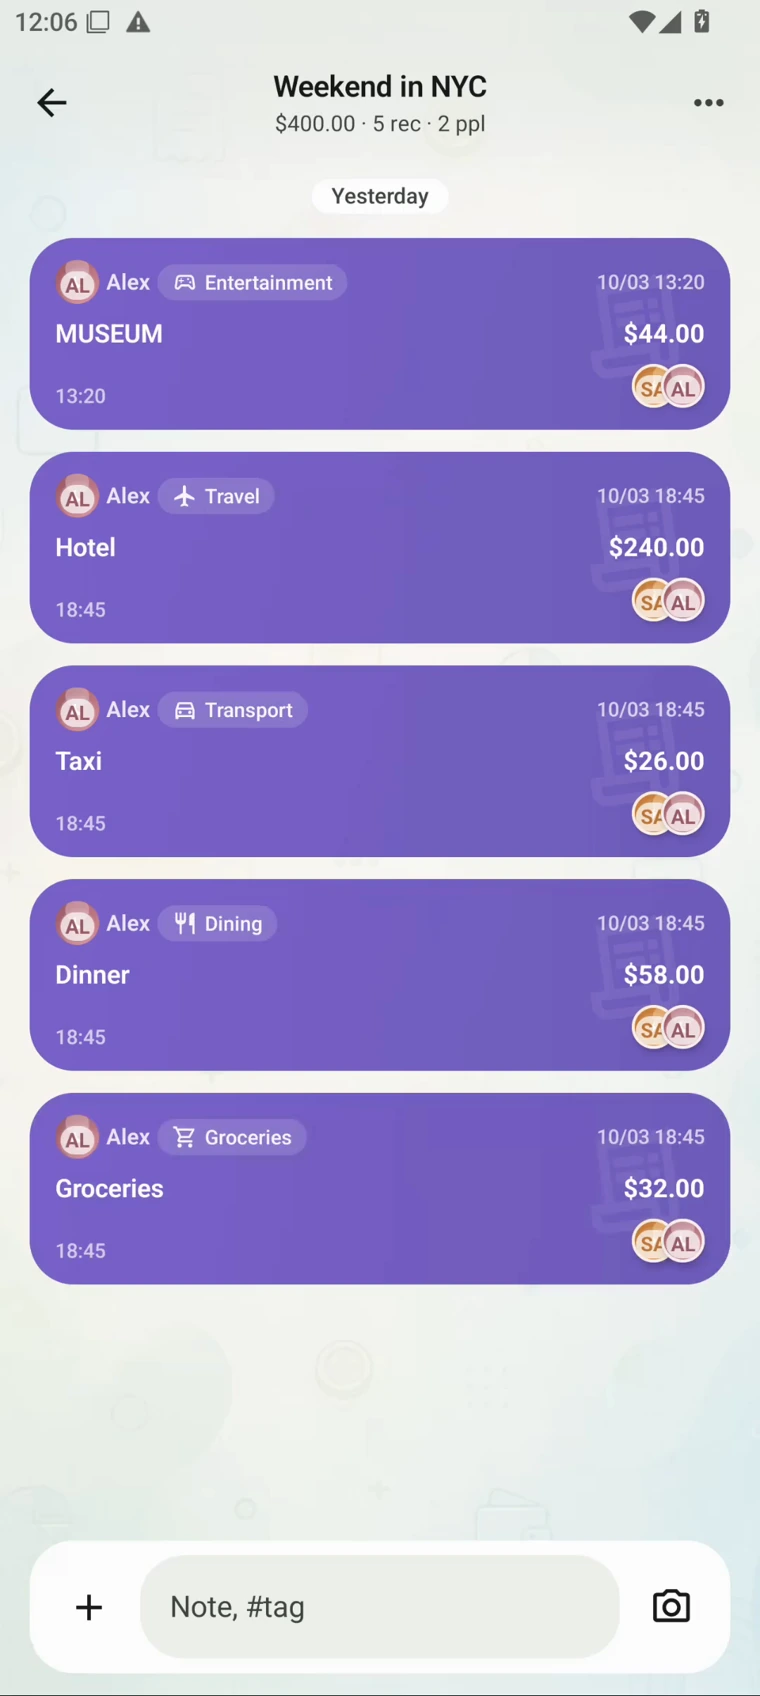
An entry marked Sending is still being submitted. If the other phone has not received it yet, check the connection, the selected ledger and any approval requirement. Avoid recognizing and saving the same receipt again while the first entry is pending.
Closing or discarding a draft before confirmation does not create the expense. If you are only trying recognition, you can stop at the review stage.
Check where the saved expense went
Open Overview and look for the museum record. In this example it is categorized as Entertainment. The book total rises from USD 356 to USD 400 after adding the USD 44 receipt.
Sam later adds USD 12 for coffee, bringing the trip to USD 412. The trip split guide includes all six expenses and explains the final USD 104 balance.
If the receipt affects the wrong person's share, reopen the saved entry and check the payer and participants. Re-running recognition is not necessary just to change who shares a purchase.
Recognition access and where the image goes
Receipt recognition requires the account using it to have its own active Basic subscription and has usage limits. Joining a ledger does not inherit the creator’s recognition allowance. Open Membership for the available recognitions and current purchase terms. The free personal-bookkeeping tools still let you enter an expense yourself.
Receipt images go to CoolMeow's dedicated recognition service. It returns fields for a draft and cannot edit the ledger directly. Your review and confirmation complete the record.
Watch the 46-second app recording
Actual iPhone and Android screens with sample data. Waiting time is edited out.